Hello ladies...
Monday, February 25, 2008
UBER UPDATE
Thursday, February 14, 2008
Monday, February 11, 2008
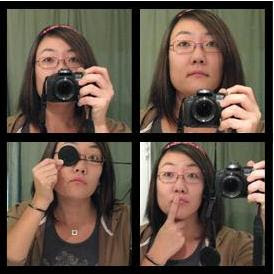
For those of you who are wondering how I make my Power Point collages, here is a step-by-step demo JUST FOR YOU!!!

Step 2: Copy and paste the photos into Power Point. You may have to minimize the size in order to make the pictures fit onto one sheet. To maintain the SQUARE shape while minimizing, move your cursor to the corner of the photo until the arrow appears, press and hold the SHIFT KEY, click and hold the arrow and minimize.
Create a square using the same SHIFT KEY method as step 2 and COVER one picture with this square. My default is a thin bordered blue filled rectangle, so I have to then select NO FILL on the FILL COLOR icon at the bottom
and choose a thicker line using the LINE STYLE icon at the bottom.
Step 4: Once ONE of these rectangles is created, you can just copy and paste it to border the rest of your photos.

Step 5: Save your Power Point collage as a JPEG. This converts it back into a picture file instead of a Power Point file.
Step 6: Upload your collage on your blog, give me some props and then wait for the flood of compliments that are sure to come!
Leave any questions in the comment section and I will be happy to help if I can!
Saturday, February 09, 2008
Went scrapbook shopping today for the first time in almost 3 months! Got some great pp, but am too lazy to take pics... use your imagination.
Go to Renee's blog because she has the cutest pics of her dog (see how lazy I am? I am sending you to ANOTHER blog because I have nothing interesting to show you!).
Friday, February 08, 2008
Thursday, February 07, 2008
Answers
- marie antoinette said...
that's very cool... i love the font and lettering. what did you make that out of? it looks like felt, but i'm not sure.
I made the LOVE IS with acrylic paint on canvas.
- renee said...
where in the world did you get that stuff??!!!! It's my dream scrapboking supply....i LOVE it!
- Jen said...
ok, but what the heck is this stuff?have i been living under a rock??
Punchinella is fun plastic ribbon that is left over after sequins are punched out, often called "sequin waste." I have used it on some of my layouts - like THIS ONE and Renee used some on THIS ONE and THIS ONE. (Hope you don't mind me linking your beautiful pages, Renee!)
- Frances said...
hey why dont you post a whole day just about ME?!?! then i'll look at it with interest, instead of just skimming half asleep...HAH again with the kidding.
Because then everyone else who reads will just skim, half asleep... HAH!
Wednesday, February 06, 2008
Tuesday, February 05, 2008
Mid-Week Update
*The days are flying by - can you believe that it is already February?
*You guys must go check out THIS on YouTube - it is brilliant.
*Work is going so well this semester. Private tutoring is picking up. I expect more in a couple of weeks after the first wave of exams - that's when students realize they need me! My new job at the computer lab is fabulous! Imagine, getting paid to read blogs! My Calculus workshops are getting better too (I had 10 students this week - an improvement to the 3 I had last week!)
*My boss at the computer lab asked if I was available for next year - YAY! They are going to hire me again! Love it...
*There is a lab aid that works with me on Tuesdays and Thursdays - he is very nice and fun (much better than the first nerd-o I met!)
*I am really dying to do some scrapbooking, but decided to devote February to my Etsy Shop which is in need of a huge update...
*I'm really sad that I can't see my new nephew until the end of the month - stupid jury duty is preventing me from going sooner.
*Tomorrow is my looooooooooong day...


